Creation Tips: Custom Solutions, Agents, and Skills
✨ Creation Tips: Custom Solutions, Agents, and Skills
📢 This feature is supported after FeelFish 3.0.0. FeelFish 3.0 is based on the industry's cutting-edge best practices of MCP, multi-agents, and Skills, providing more powerful customization features. You can use it to define your creative workflow and boost your creation efficiently~ Let's go~ 🚀 May your ideas flow endlessly and your earnings multiply~
In FeelFish, you can customize your AI writing process through Solutions. A Solution is composed of Agents and Skills. You can leverage them to build the AI creative workflow that best suits your project. This article explains what they are, how to configure them, and how to use "Custom Solutions" to meet more advanced creative needs.
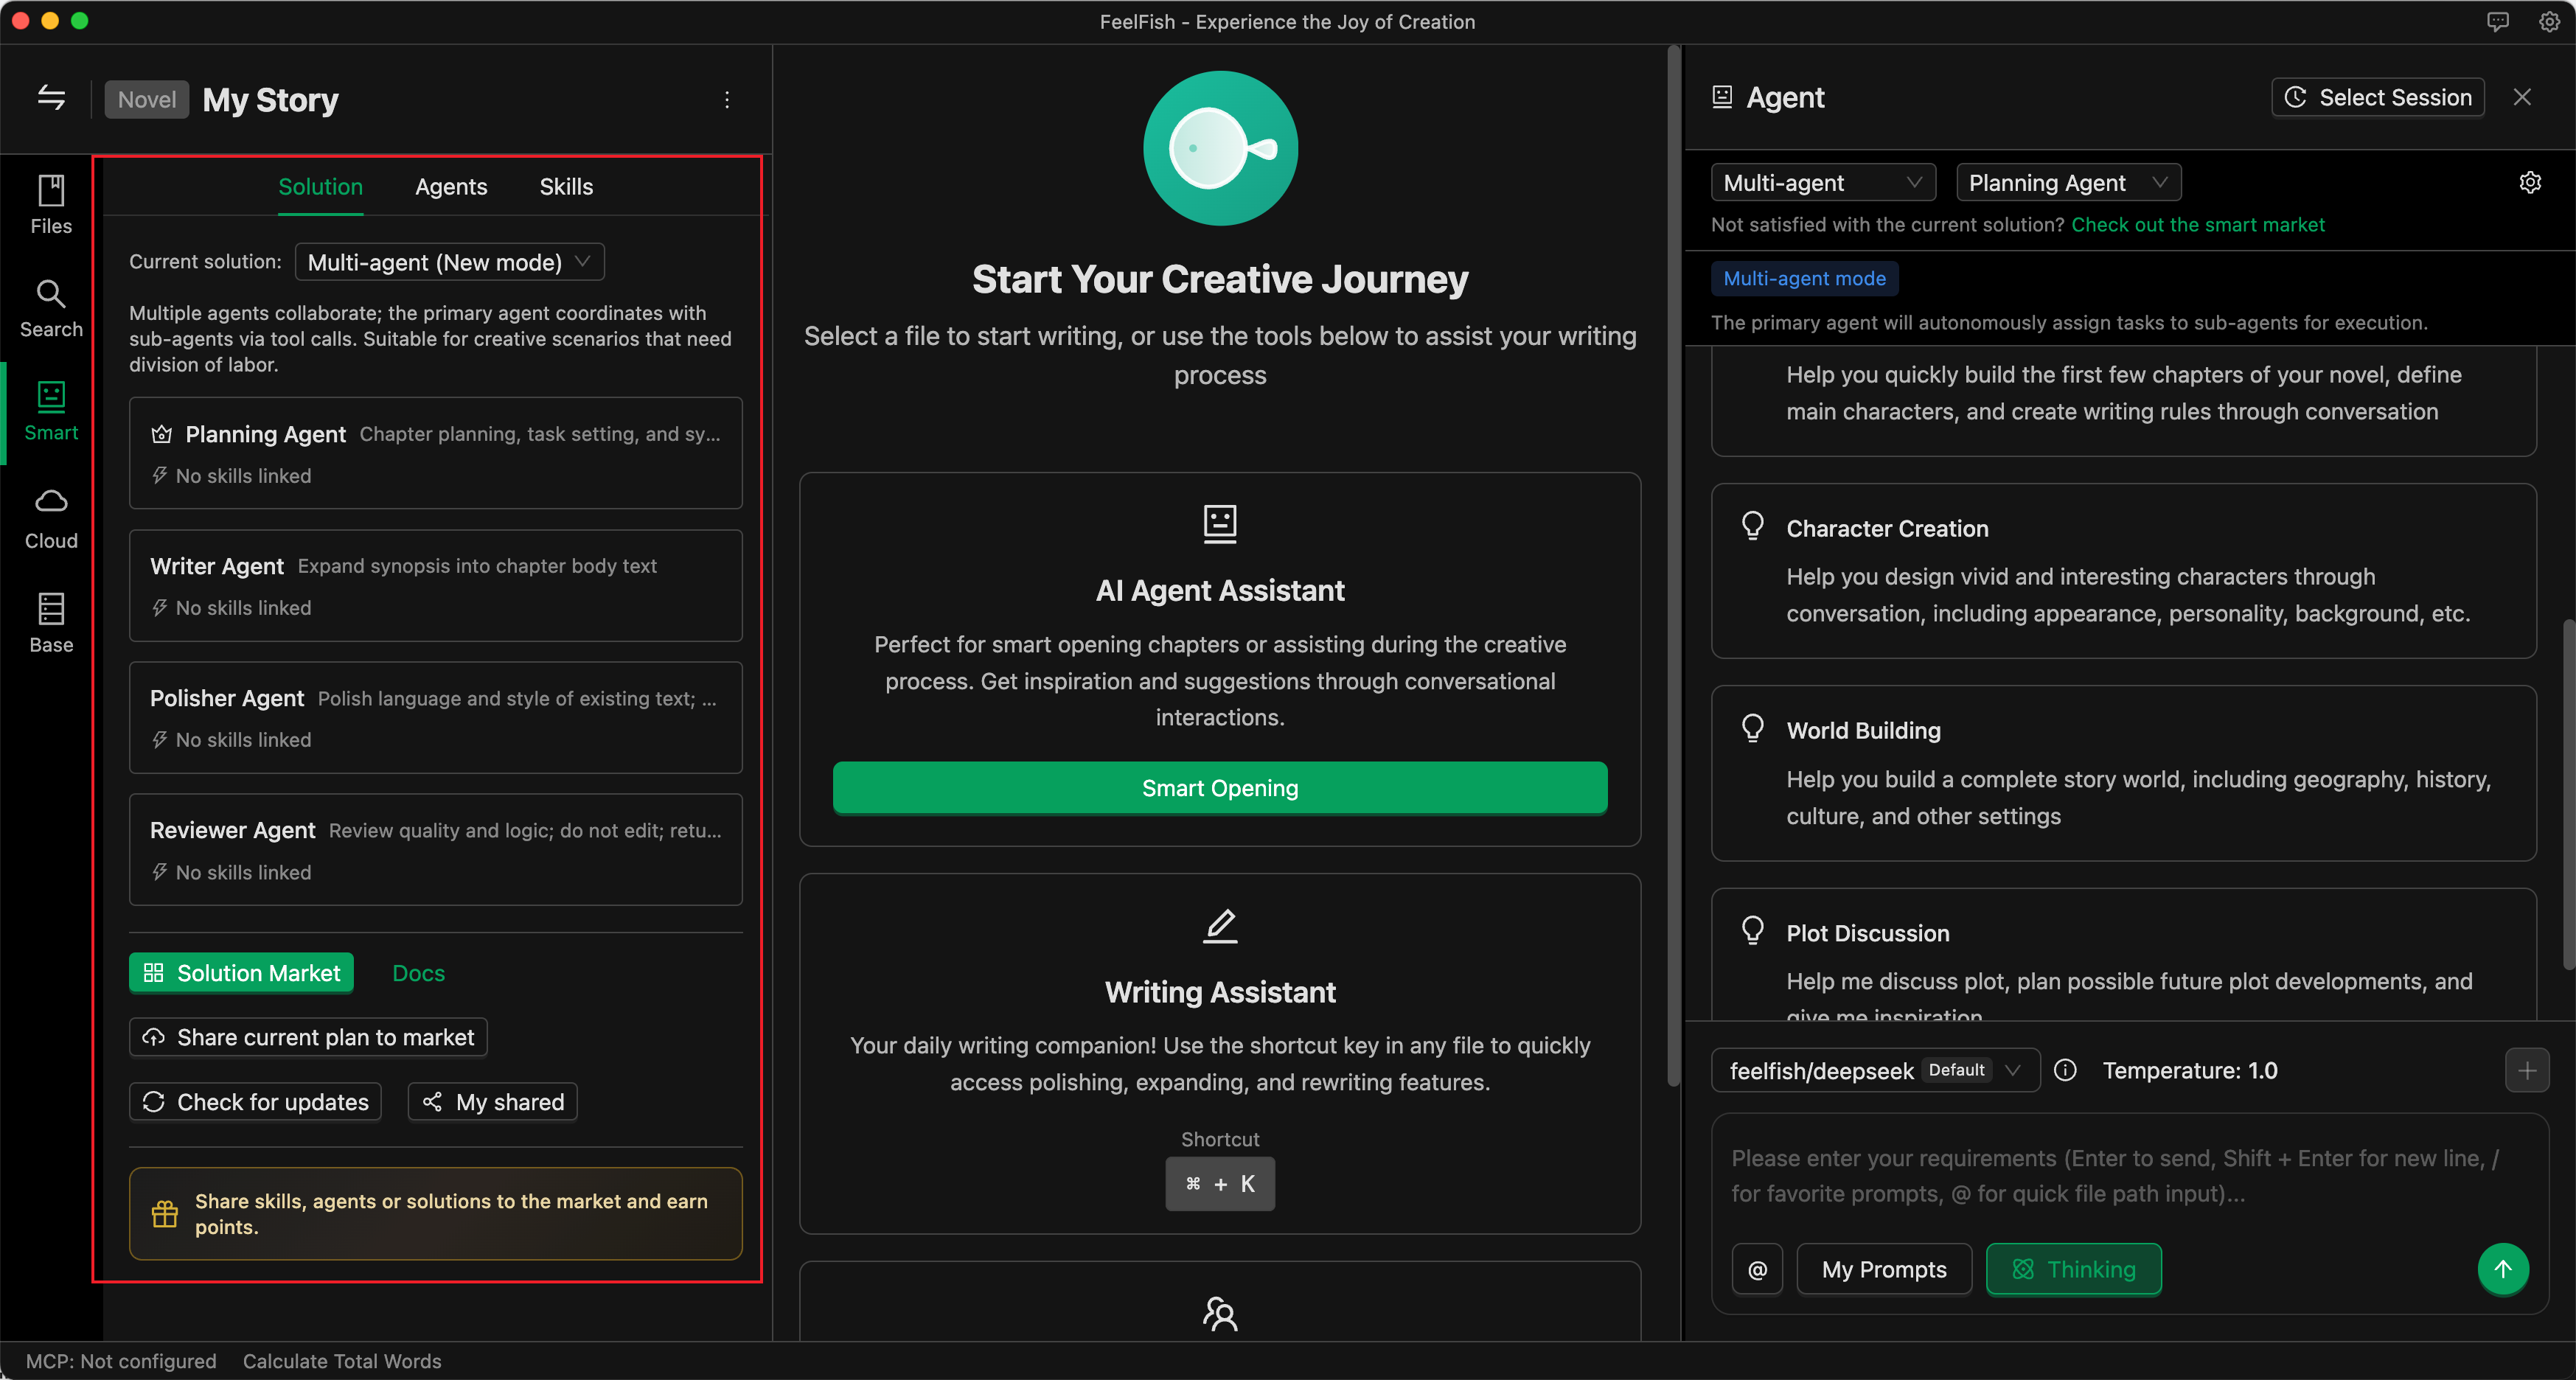
🖼️ Solution Configuration Interface
💡 I. Core Concepts
📋 Solution
A Solution determines "which agents are used in the current conversation, who is the main agent, and who are the assistants."
Switching solutions = switching an entire set of agent combinations, without needing to adjust settings one by one.
- Built-in Solutions: Come with the software, such as "Professional Assistant," "Multi-Agent," "Intelligent Planning," "Game Adventure," etc., ready to use out of the box.
- Custom Solutions: Automatically formed when you select/sort agents and set a main agent in the "Solutions" section of the left panel. The configuration is saved in the project's
.feelfishdirectory and only applies to the current project. - Market Solutions: Download solutions shared by others from the resource marketplace and apply the agent combination with one click.
The "Select Solution" dropdown at the top of the conversation area will list: current built-in solutions, custom solutions, and downloaded market solutions.
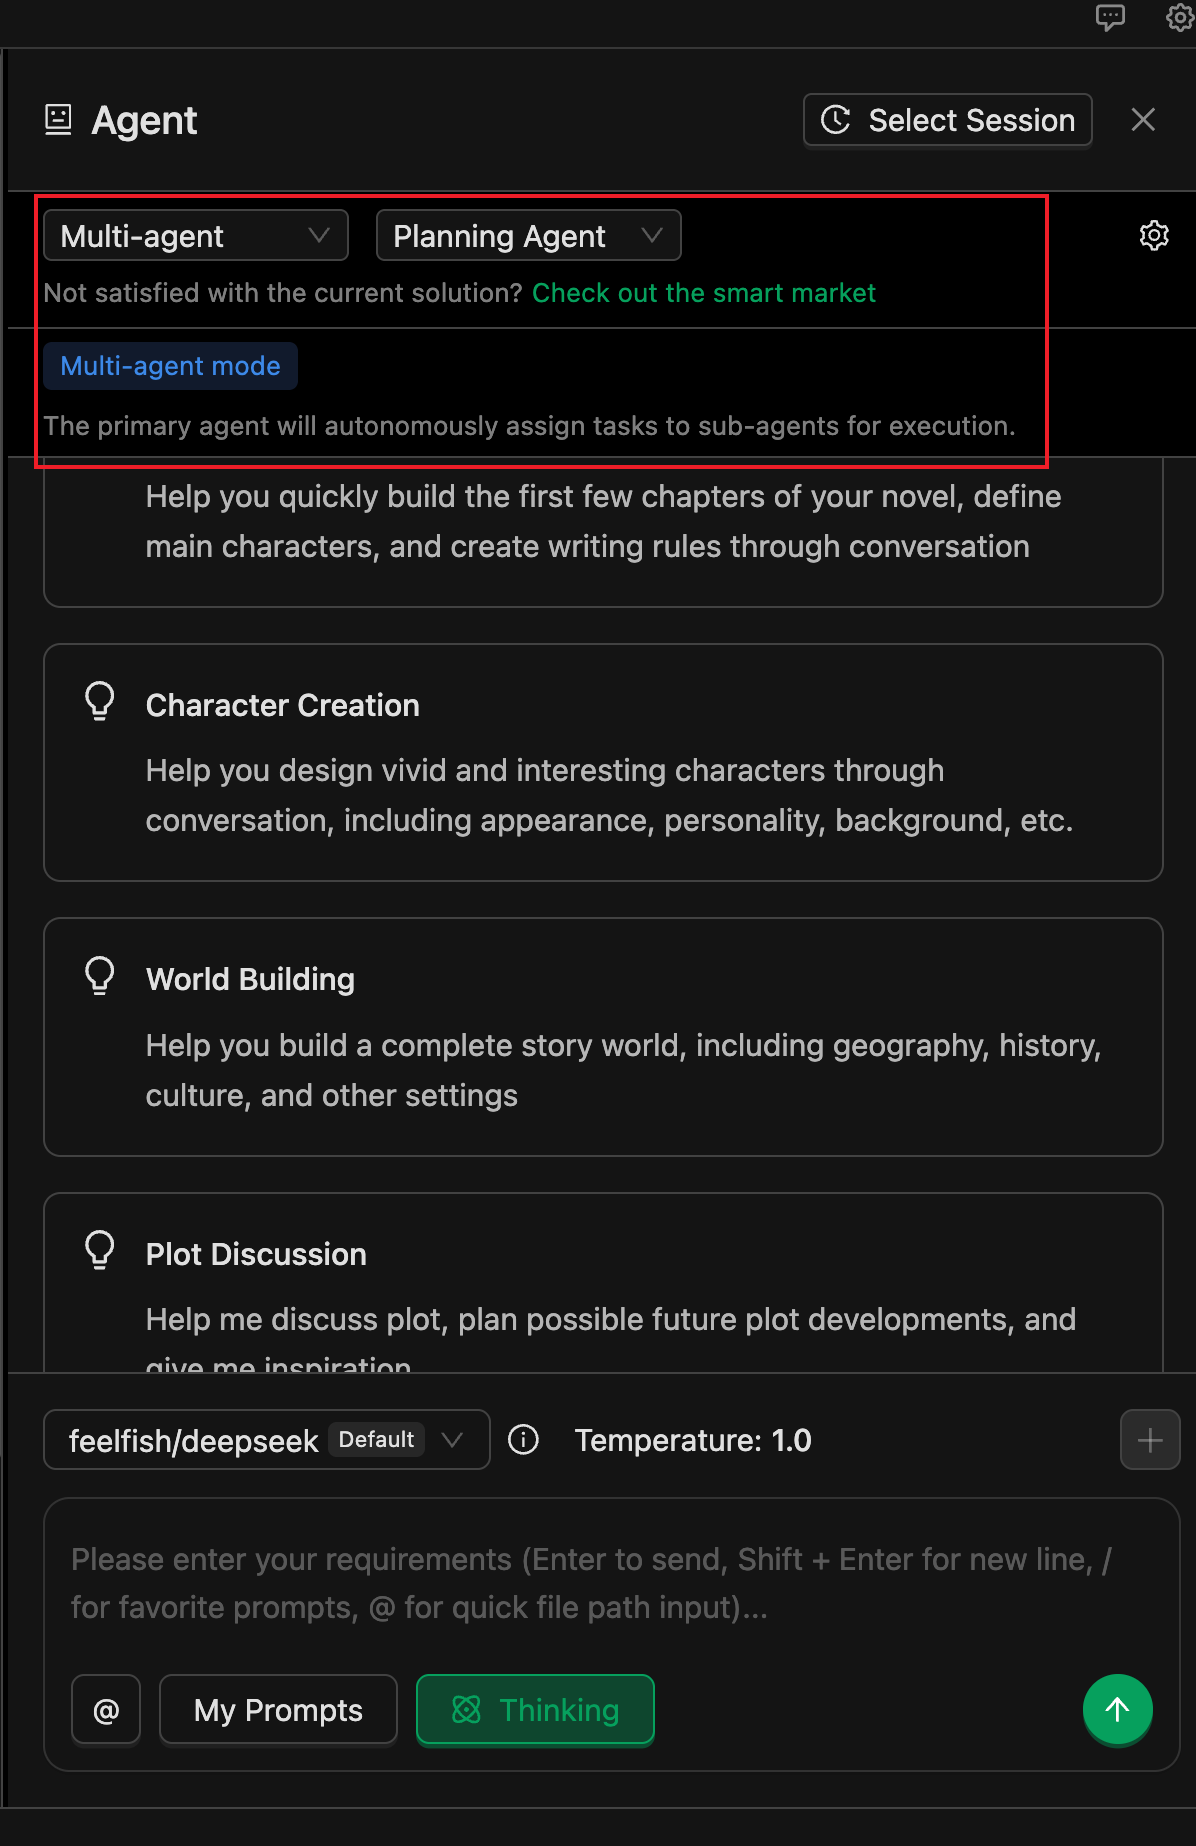
🖼️ Solution Selection Dropdown
🤖 Agent
An Agent is an AI role that performs specific tasks. Each agent has its own instructions (system prompt), available tools, and associated skills.
- Main Agent: The one responsible for replying and coordinating tasks by default in a conversation. In a multi-agent solution, the main agent can call sub-agents via tools to complete specialized tasks (e.g., an agent dedicated to writing a certain type of content).
- Built-in Agents: Such as Professional Assistant, Planning, Creation, Polishing, Review, etc. These cannot be deleted, but you can configure "Skill Override" and models for them individually.
- Custom Agents: Created in the "Agents" tab on the left. Write their instructions and behavior guidelines in Markdown, configure tool permissions, and associate skills. The file is saved in
.feelfish/agents/<id>.md.
The "Enabled Agents" list in a solution, together with the "Main Agent," determines the actual set of agents available in the current conversation.
📚 Skill
A Skill is a "documentation" that can be reused by multiple agents. It usually describes a certain type of writing specification, style, or process (e.g., "Outline Creation Guidelines," "Character Description Techniques").
At runtime, agents can see the names and descriptions of skills configured in the current project and can read the skill content via tools as needed (the main file is .feelfish/skills/<skill-name>/SKILL.md), allowing them to follow your settings more consistently.
- A skill consists of a directory under the project with a main file SKILL.md located at
.feelfish/skills/<skill-name>/SKILL.md. - Skill Name = directory name, must satisfy: lowercase letters, numbers, hyphens, and match the directory name (e.g.,
outline-helper). - SKILL.md must include YAML frontmatter:
name: Must match the directory name.description: A brief description (max ~1024 characters) for the agent to decide whether to use this skill for a task.
- Below the frontmatter is the skill content (Markdown), where you write specific guidelines, examples, or steps. The agent reads the file content via tools to follow these instructions.
The skill directory can also contain other markdown files or subdirectories as supplementary materials; the main entry is always SKILL.md.
Creating and Editing Skills
- In the "Skills" tab of the intelligent panel, click "New Skill," enter a skill name (e.g.,
outline-helper), and confirm. This automatically creates.feelfish/skills/<name>/SKILL.md. - Click "Edit" in the list or open SKILL.md, fill in the frontmatter's
nameanddescription, and write the skill content below. - You can also "Import from Local" to import a skill from an existing file/folder/ZIP (must contain SKILL.md).
Associating Skills with Agents
- Custom Agents: In their
.mdfile, addskills: ["skill-name1", "skill-name2"]in the frontmatter, or select them in the "Associate Skills" section of the agent's edit interface. - Built-in Agents: Find the corresponding built-in agent in the "Agents" list and use "Skill Override" to specify the skill list for the current project. If not overridden, the built-in agent uses its default configuration.
At runtime, the system injects the names and descriptions of skills configured in the current project into the agent's context. The agent then uses tools like read_file_content to read the full content of .feelfish/skills/<name>/SKILL.md as needed.
🛠️ II. Custom Solution: From Zero to Usable
When to Use a Custom Solution
- When built-in solutions don't fit your work type or workflow well enough (e.g., you want to fix a combination of "Planning + a specific custom agent").
- When you want to lock a set of agents you've assembled (including custom + built-in) and set a main agent.
- When you want configurations to only apply to the current project, without affecting others.
How to Form a "Custom Solution"
-
Open your project and go to the Intelligent configuration panel on the left (entry point for intelligent settings).
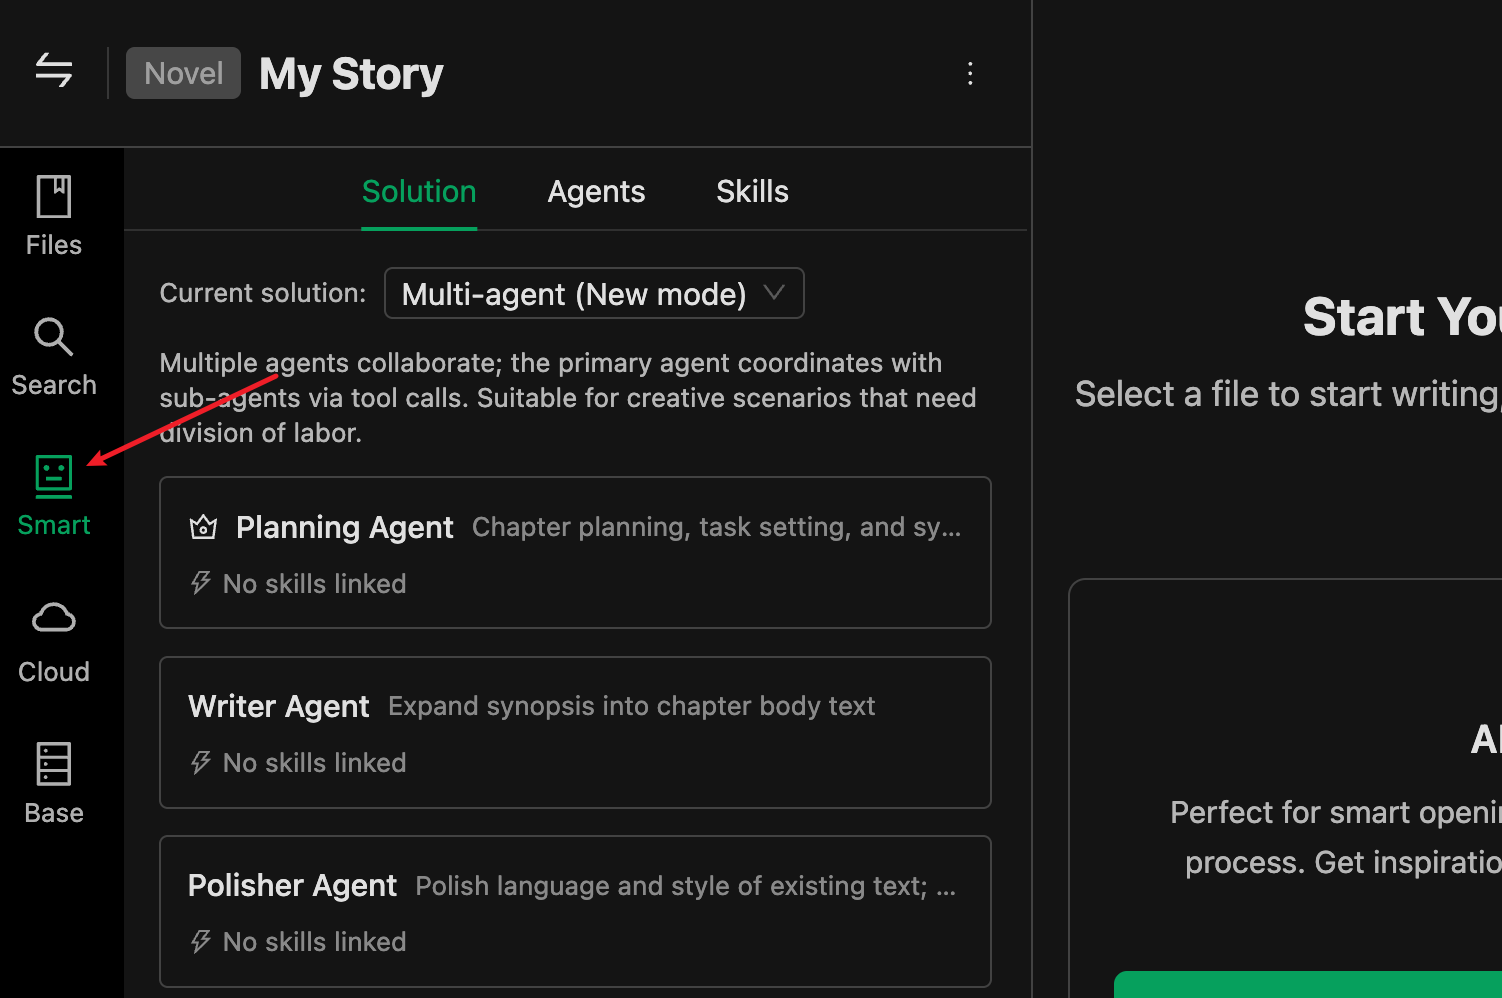
🖼️ Intelligent Panel Entry -
Switch to the "Agents" tab to add agents, or select agents shared by other users from the marketplace.
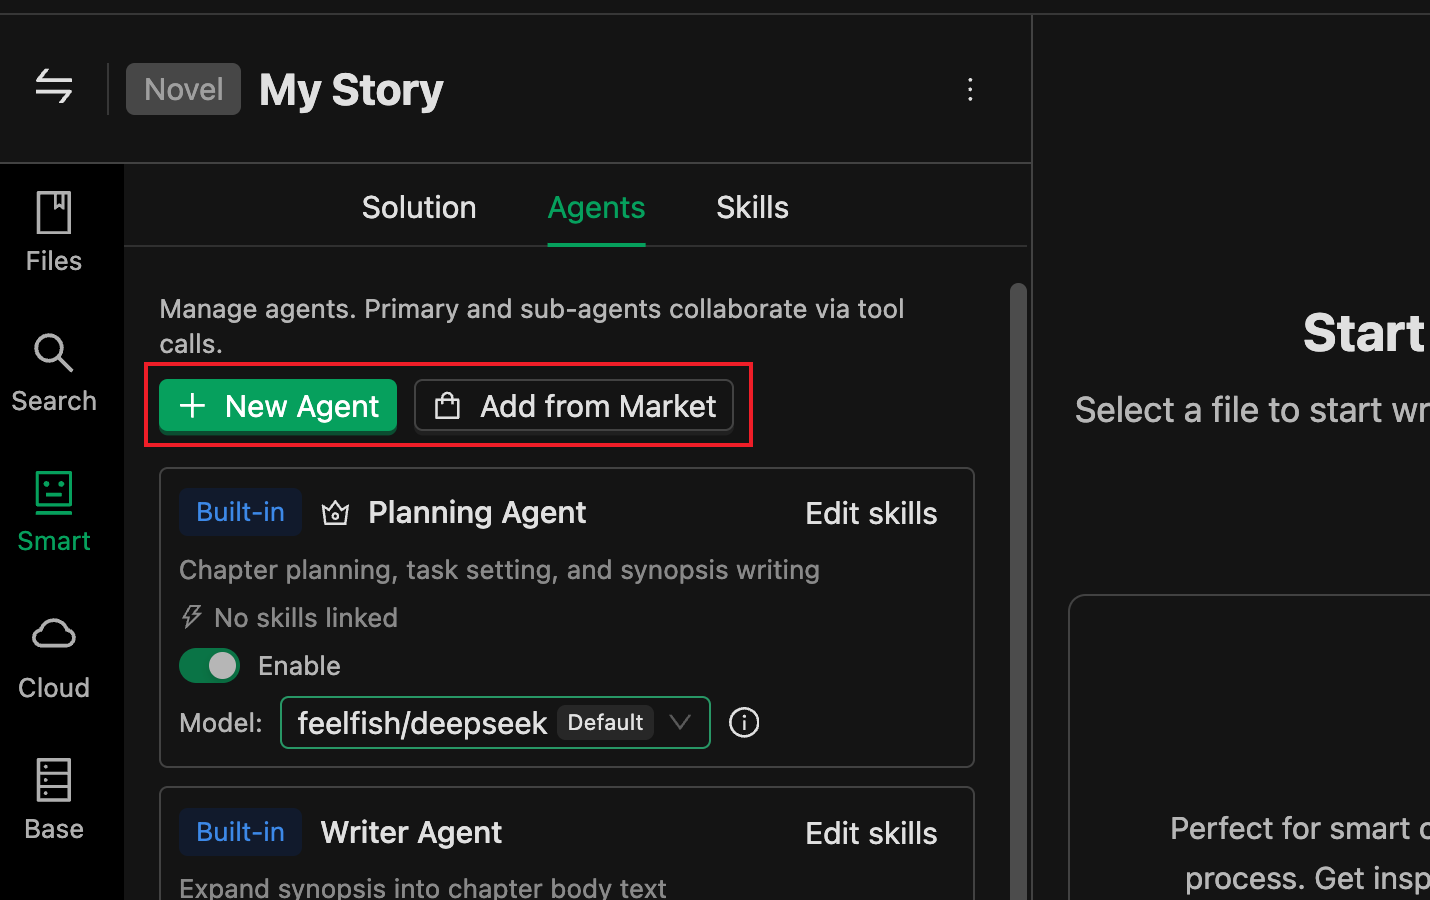
🖼️ Adding Agents
You can enable multiple agents and set one as the main agent. The main agent coordinates the work of other agents. The agent's description is crucial; the main agent decides whether to delegate tasks to sub-agents based on its own settings and the descriptions of sub-agents.
🖼️ Setting the Main Agent
Once you modify any logic in the "Agents" tab, a new solution is automatically formed and becomes your "Custom Solution". In the "Select Solution" dropdown at the top of the conversation area, you'll see the "Custom Solution" option; selecting it uses the combination you just configured.
In other words: You don't need to separately "create a solution"; as soon as you select "who to use + who is the main" in the Agents panel, a custom solution is automatically created.
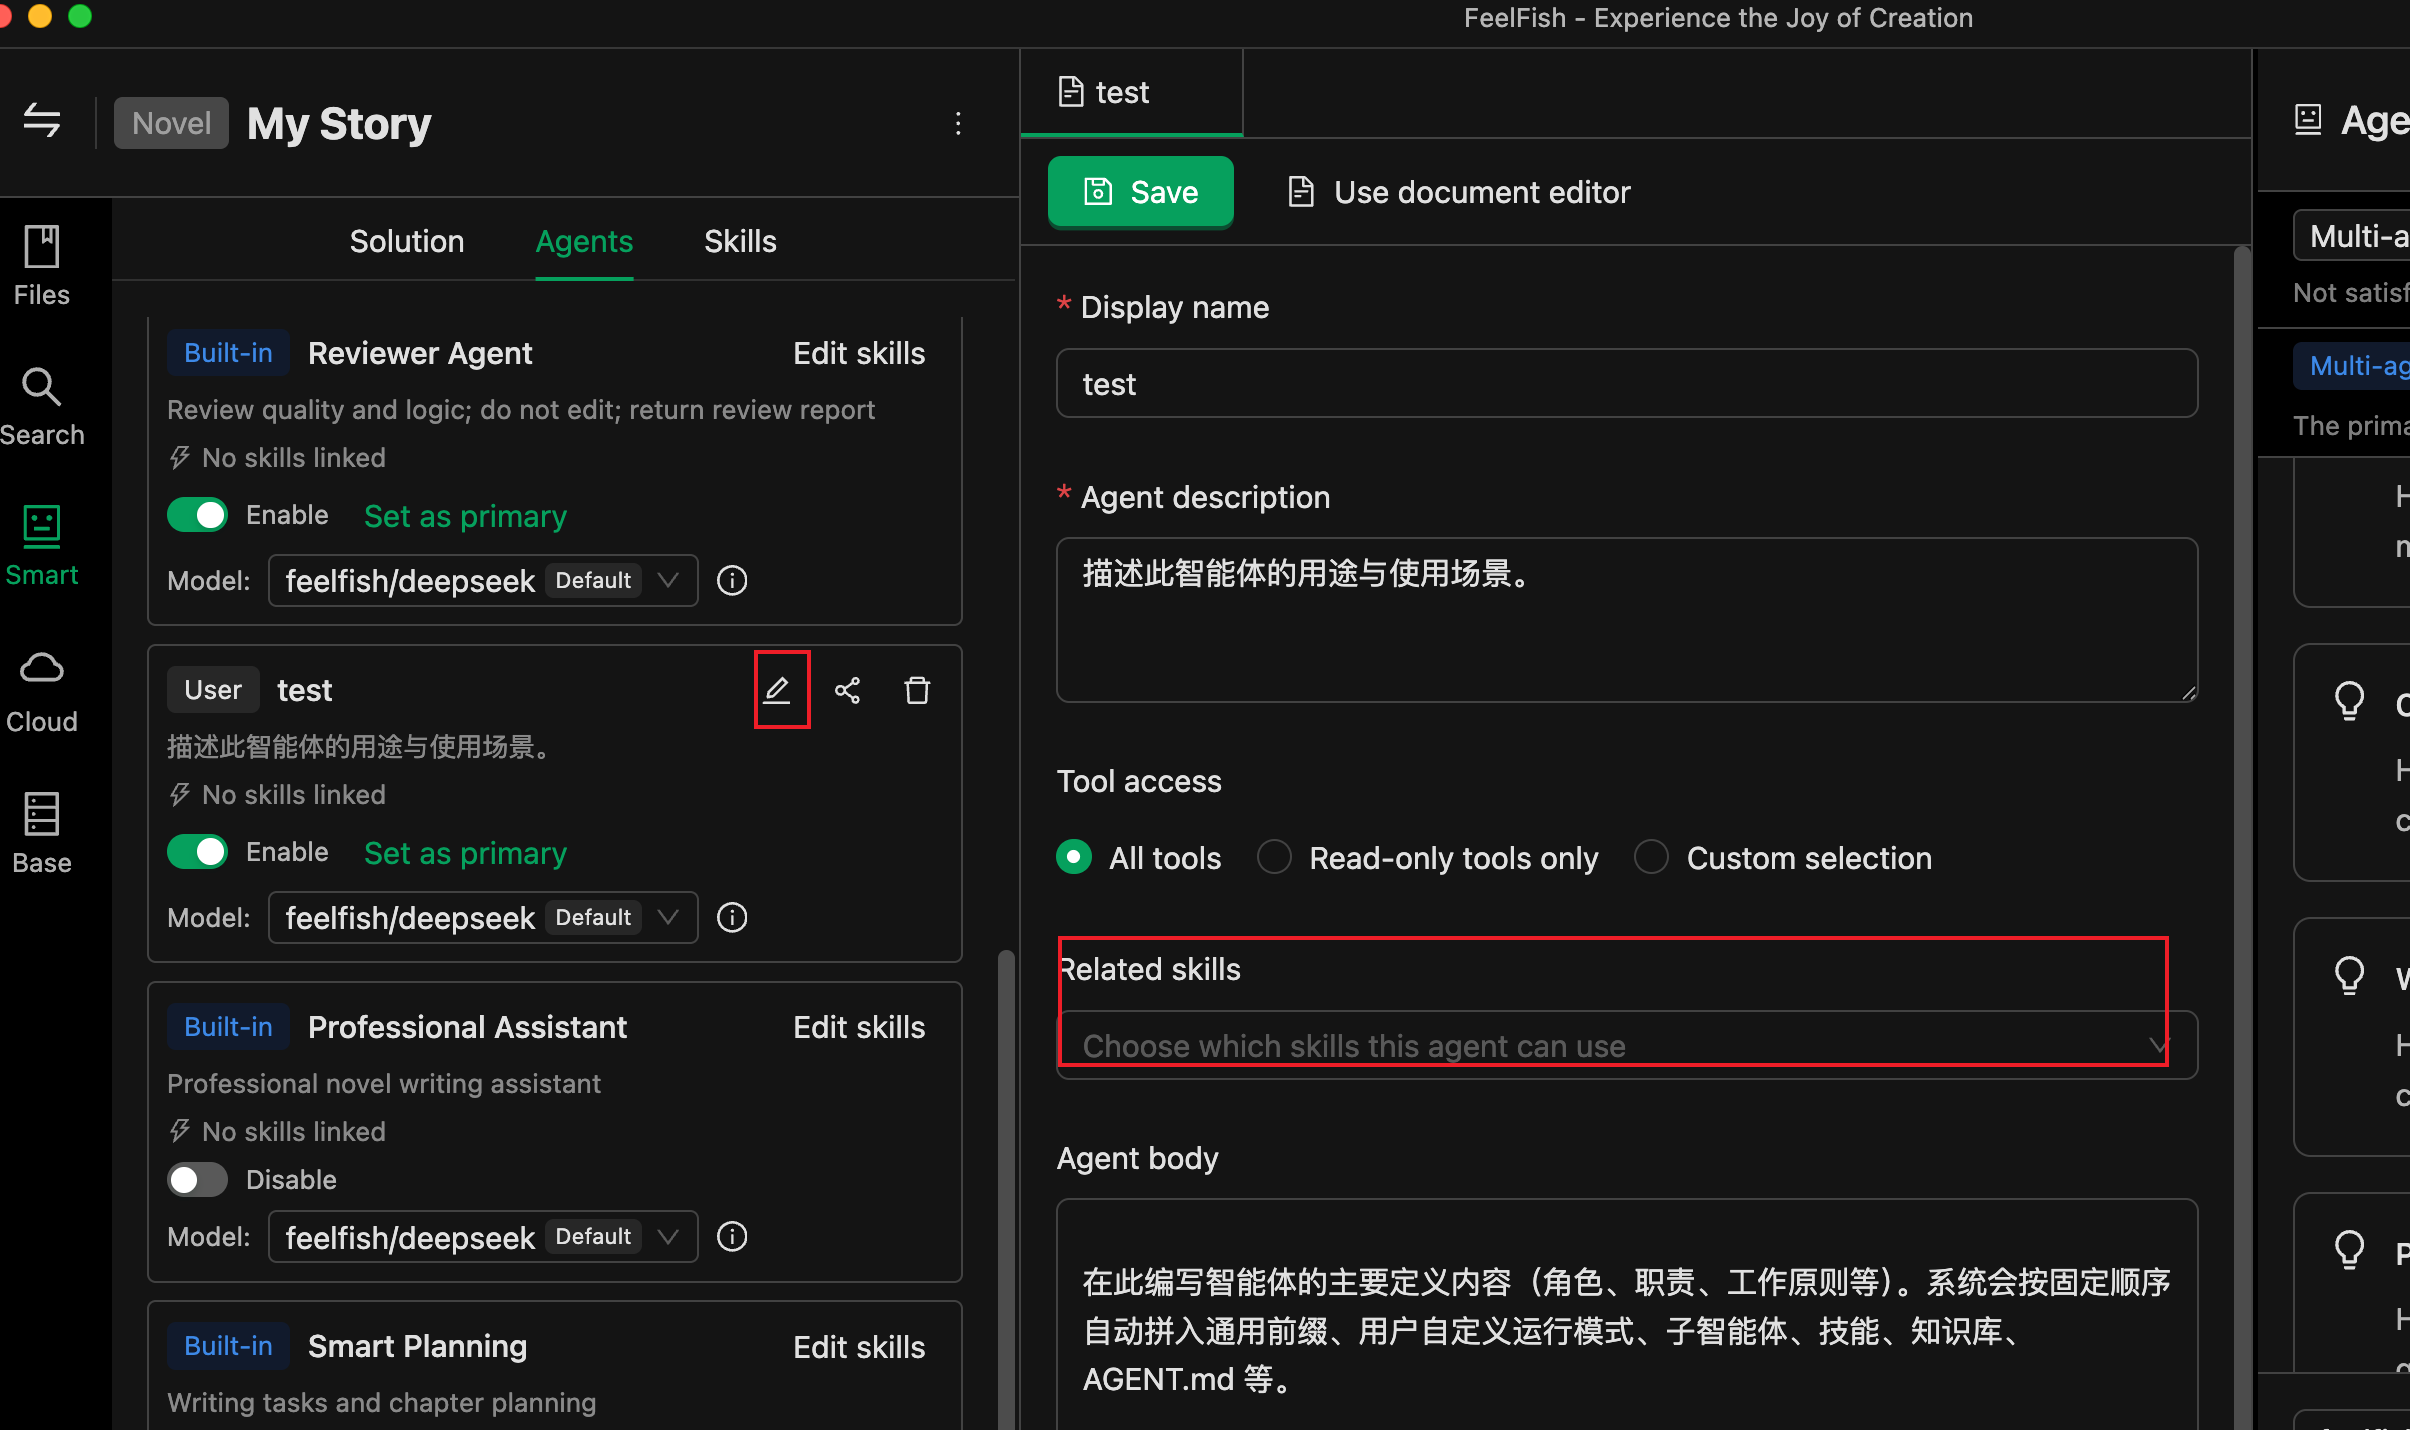
- Add appropriate "Skills" to your agents
Skills act like instruction manuals. For example, if you have a "Polishing Agent" and want to teach it how to remove AI-generated tone, you can organize your experience into a document, create a skill, and put the relevant content into that skill.
Then associate the skill with the agent. This way, your agent possesses that skill and will read and modify content based on the skill when needed.

🖼️ Associating Skills
As shown above, you can edit your agent and associate skills.
🤖 III. Agents: Built-in vs. Custom
Built-in Agents
- Cannot be deleted or removed from the project definition. You can enable/disable them in the current project and designate a Main Agent.
- You can configure for built-in agents:
- Skill Override: Only applies to the current project, overriding the agent's "default skills" with the skill list you specify.
- Model: In "Agent Model Configuration" or when selecting the agent in the conversation area, you can specify which model it uses.
Custom Agents
- Create: In the "Agents" tab, click "New Agent," enter an ID (e.g.,
my-helper, lowercase, numbers, hyphens). After confirmation, a file is generated at.feelfish/agents/<id>.md. - Edit: Open the
.mdfile and structure it as follows:- The file starts with YAML frontmatter (enclosed by
---), containing:name: Display name (can be in Chinese).description: Brief description for the system and users to understand the agent's responsibilities.tools: Optional; can beall/readonlyor an array of tool names.skills: Optional; list of associated skill names (corresponding to skill names under.feelfish/skills/).
- Below the frontmatter is the agent instruction content (Markdown). Clearly describe the agent's behavior, style, prohibitions, etc. The AI will incorporate this content into its system prompt.
- The file starts with YAML frontmatter (enclosed by
- Enable and Set as Main Agent: In the "Agents" list, check the box to enable, and optionally click "Set as Main Agent." If the current solution is a custom solution, it will update
.feelfish/solution/feelfish-custom.json.
Custom agents can also be associated with skills and have models configured. In multi-agent collaboration, the main agent can use tools to delegate subtasks to other enabled agents (sub-agents) for execution.
📝 IV. Skills: Creation and Association
What is a Skill?
- A skill = a directory under the project + a main file SKILL.md at
.feelfish/skills/<skill-name>/SKILL.md. - Skill Name = directory name, must satisfy: lowercase letters, numbers, hyphens, and match the directory name (e.g.,
outline-helper). - SKILL.md must include YAML frontmatter:
name: Must match the directory name.description: A brief description (max ~1024 characters) for the agent to decide whether to use this skill for a task.
- Below the frontmatter is the skill content (Markdown), where you write specific guidelines, examples, or steps. The agent reads the file content via tools to follow these instructions.
The skill directory can also contain other markdown files or subdirectories as supplementary materials; the main entry is always SKILL.md.
Creating and Editing Skills
- In the "Skills" tab of the intelligent panel, click "New Skill," enter a skill name (e.g.,
outline-helper), and confirm. This automatically creates.feelfish/skills/<name>/SKILL.md. - Click "Edit" in the list or open SKILL.md, fill in the frontmatter's
nameanddescription, and write the skill content below. - You can also "Import from Local" to import a skill from an existing file/folder/ZIP (must contain SKILL.md).
Associating Skills with Agents
- Custom Agents: In their
.mdfile, addskills: ["skill-name1", "skill-name2"]in the frontmatter, or select them in the "Associate Skills" section of the agent's edit interface. - Built-in Agents: Find the corresponding built-in agent in the "Agents" list and use "Skill Override" to specify the skill list for the current project. If not overridden, the built-in agent uses its default configuration.
At runtime, the system injects the names and descriptions of skills configured in the current project into the agent's context. The agent then uses tools like read_file_content to read the full content of .feelfish/skills/<name>/SKILL.md as needed.
🚀 V. Recommended Workflow
- Start with a Broad Direction: In the "Select Solution" dropdown in the conversation area, choose a built-in solution (e.g., "Multi-Agent" or "Professional Assistant") and run through a creative process once.
- Add Skills as Needed: In the "Skills" tab, create 1–2 skills, write the specifications (e.g., outline format, character card format), and then associate these skills with the main agent (or relevant sub-agents) in the "Agents" tab.
- Refine the Solution: If built-in solutions are insufficient, go to the "Agents" tab to enable/disable, sort, and set a main agent, forming a "Custom Solution." If necessary, create new custom agents dedicated to specific tasks (e.g., "only write outlines," "only polish dialogue").
- Supplement from the Marketplace: Browse solutions, agents, and skills shared by others in the "Solutions" or resource marketplace. Apply them with one click or pull them locally for further tweaking.
- Share and Reuse: If your solution/agent/skill is useful to others, you can publish it to the marketplace via "Share to Marketplace," or reuse it within your team through export/import.